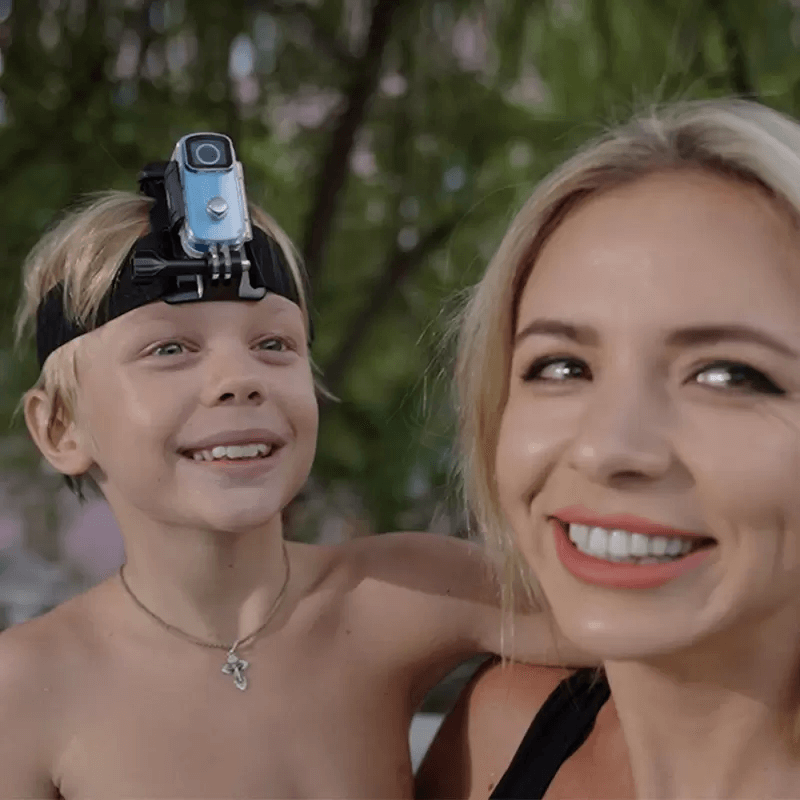
An action camera is a must-have device for adventurers who wish to capture their experiences from a dynamic, first-person viewpoint. The head mount is one of the most popular ways to secure an action camera because it provides an unobstructed view and offers hands-free convenience. However, mounting an action camera to a head mount properly is crucial to achieving the best results in terms of video stability and angle. In this guide, we will walk you through the steps to mount your action camera effectively on a head mount, with a special recommendation at the end for the SJCAM Action Camera Head Mount.
Understanding Your Equipment
Before diving into the mounting process, it’s essential to familiarize yourself with your equipment. This includes both your action camera and the head mount. Make sure you have:
- An Action Camera: This could be any brand or model you prefer, but for this guide, we’ll illustrate using the versatile SJCAM series which is compatible with most mounting systems.
- A Compatible Head Mount: Ensure your head mount is designed to support your action camera’s size and weight. A universal mount like the SJCAM Action Camera Head Mount is a great start as it fits most cameras.
Step 1: Prepare Your Action Camera
Before attaching your camera to the head mount, it’s important to prepare it:
- Charge Your Camera: Make sure your camera is fully charged to avoid interruptions during recording.
- Insert the Memory Card: Ensure the memory card has adequate space for recording. Format it if necessary.
- Adjust Camera Settings: Set your camera to the desired resolution and frame rate beforehand, as adjusting settings mid-action can be tricky.
Step 2: Assemble the Head Mount
Unbox your head mount and become familiar with its parts:
- Inspect the Mount Components: Ensure that all parts are present, including straps, adjustment buckles, and the camera mount.
- Attach Any Required Adapters: If your camera requires a specific adapter for mounting, ensure it is securely attached. The SJCAM Head Mount often comes with compatible adapters for non-standard camera shapes.
Step 3: Attach Your Camera to the Mount
With both your camera and head mount ready, follow these steps to secure your camera:
- Locate the Mounting Base: Most head mounts feature a flat or slightly curved surface for attaching the camera.
- Secure the Camera: Use the screw or clip mechanism to attach your camera securely. Make sure it’s tightened enough to avoid wobbling, but not so tight as to strip the threads or damage the housing.
- Check Alignment: Align the camera with the base to ensure it is facing directly forwards. Test the alignment by taking a few test shots or videos and adjust as necessary.
Step 4: Adjust the Head Mount for Comfort
A comfortable fit is essential for capturing smooth footage:
- Fit the Straps: Place the mount on your head and adjust the straps. The fit should be snug but not too tight.
- Balance the Weight: Ensure the camera doesn’t feel too heavy on one side. If necessary, adjust the strap positioning until the head mount feels balanced.
- Test the Fit: Move around to check if the head mount stays in place comfortably. Try gentle head movements to ensure stability.
Step 5: Optimize the Camera Angle
To capture the best footage, the angle of the camera plays a significant role:
- Choose the Right Angle: For a natural POV, the camera should be angled slightly downward. This angle depends on your activity—experiment by recording short clips at different angles to see what provides the best view.
- Consider External Conditions: If you’re planning to record in windy conditions, angle the camera slightly downward to minimize the impact of wind resistance.
Step 6: Conduct a Test Run
Before heading out for your adventure, conduct a brief test:
- Record a Short Clip: Walk around and perform a few natural movements.
- Review the Footage: Check for stability and framing. Make any necessary adjustments to the mounts or settings based on your observations.
Step 7: Hit the Adventure
With everything set, you’re ready to capture your action-packed moments. Remember to enjoy the experience without constantly worrying about the recording; with the right setup, your camera should handle it all.
Why Choose the SJCAM Action Camera Head Mount?
Among the many options available, the SJCAM Action Camera Head Mount stands out for several reasons, making it an excellent choice for both beginners and seasoned adventurers:
- Versatile Design: The SJCAM Head Mount is designed to securely hold a wide range of action cameras. Its compatibility with various models ensures a fit that’s nearly universal.
- Comfort and Stability: With adjustable straps and a well-cushioned design, it provides long-lasting comfort and stability, even during prolonged use.
- Quality Build: Constructed from durable materials, it can endure tough environmental conditions, ensuring your camera remains steady and safe throughout your adventures.
- Ease of Use: Its straightforward setup process is perfect for those who want a reliable mounting solution with minimal fuss.
In conclusion, mounting your action camera correctly on a head mount involves careful preparation and thoughtful adjustment to capture stunning and immersive footage. By following this guide, you can ensure that your recordings are of the highest quality, providing viewers with a front-row seat to your exploits. Equip yourself with a reliable setup like the SJCAM Action Camera Head Mount, and you’ll be ready for any adventure that comes your way.


